
How to Mic a Drum Kit
Capturing the full dynamic range of a drum kit in a studio or live setting can be a challenging yet rewarding task. Each piece from the kick to the snare, and the overheads to room mics plays a crucial role in the overall sound. Let’s dive into the nuances of miking a drum kit.
Drumfluence is reader-supported. When you make a purchase through links on our site, we may earn an affiliate commission at no extra cost to you. Learn more.
There are lots of ways to mic a drum set. Let’s walk through how to mic a drum kit, all the way from kick and snare to toms, overheads and rooms, including mic recommendations and placement.
Kick Drum
Kick drums come in lots of sizes, from big, wide Bonham-style 14″ x 26″ bass drums to much smaller kick drums. There are lots of mic techniques for getting a great kick drum sound. Here are some miking options you might want to try.
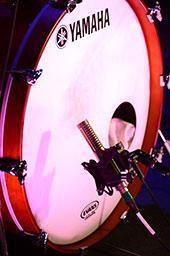
* One mic outside the front (resonant) head
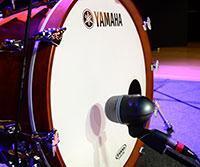
Putting a mic in front of the outer head is the most common kick drum mic placement, but there are still plenty of variables. Whether you put an E-V RE20, AKG D112, or Shure Beta 52A on the outside of the kick, you’ll find lots of variability in the sound depending on where on the head you position it and the distance away from the head. For live sound on a kick with no hole in the head, I find that positioning the mic in the lower half of the head about one-third of the drum’s diameter away from the rim will work well. Put the mic between 1″–3″ off the outer head.
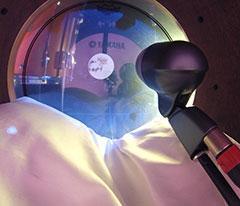
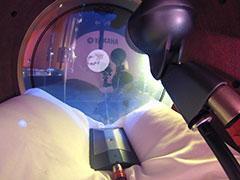
* One boundary mic lying inside the kick
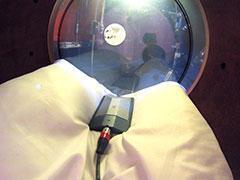
Placing a boundary mic on a pillow inside the kick is the simplest option if you have a hole in the resonant head. It keeps the bleed from other drums and cymbals to a minimum and will give you lots of impact. Some people like to drop a Shure Beta 91A or Beyerdynamic TG D71c condenser mic in the hole, laying it right on the pillow at the bottom of the kick. That gives lots of low end, and it’s a great no-fuss solution because you don’t have to mess with a mic stand.
* One stand mic inside the kick
There are lots of mics that work well inside the kick. In addition to the perennial favorite mics listed above are the Audix D6, E-V ND68, Telefunken M82, and Sennheiser MD 421 II. Using any of these mics on a small boom stand will allow lots of flexibility in positioning. As you move the mic closer to the batter head and closer to the center of the drum, you’ll get lots of attack (click) but not as much low end. Moving off-axis from the center of the drum will yield a more balanced sound (low end to top end), and moving away from the head will change the sound even more. I typically position the mic off center on the drum head (at about 1/3 of the drum’s diameter) and about halfway back in the depth of the shell.
* Two mics inside
Using a boundary mic lying inside the drum for the low end, combined with another stand-mounted mic for the attack, gives a lot of flexibility when crafting an awesome sounding kick. Boundary mics like those mentioned above resting inside the kick with a mic on a stand positioned near the beater will yield excellent results. Dynamic mics like the Sennheiser 421 or Shure SM58 will work well for capturing the attack.
* One mic inside and one mic outside
You can get great results by using an inside kick mic combined with a mic outside the kick. I love the low end that comes out of a Royer R121 positioned outside the kick about halfway up the head, just a few inches off the head, angled at 45 degrees to the plane of the head. Mix the two mics together to taste to get a sound as big or as pointy as you like.
NOTE: If using a ribbon mic on kick drum, stay away from the hole where there’s a huge rush of air forced out when the drum is played.
NOTE: For the outside mic you can alternately use the DW The Moon Mic in front of the kick as a low-frequency pickup source too.
Snare Drum
Microphone choice has a huge impact on the sound of a snare drum. Popular options for live or recording uses are the Shure SM57, Telefunken M80, and Audix i5. To find out about other great snare mics and even hear what they sound like, check out Sweetwaters article “Best Mics for Recording Snare Drums”.
* Over – The typical way to mic a snare drum is to put a mic slightly over the snare and you’re done. While that will definitely work, a great deal more finesse can and should be applied. My typical starting position is placing the mic about 1.5″ above the head, 2″ inside the rim, and aimed down at the center of the head. If I want less low end, I move the mic farther away from the drum (higher) or farther from the center of the head, which diminishes the low end due to diminished proximity effect.
* Over/Under – If you want more buzz or more snare sound (the wires that run under the bottom head) from the drum, adding a second mic beneath the drum is a great idea. Point the under-snare mic at the snare wires from a few inches away. Listen to the under-snare mic combined with the over-snare mic, and switch the polarity of the under-snare mic. Use whichever setting yields the most low end.
To read lots more about miking a snare, along with sound samples, check out Sweetwaters article “How to Mic a Snare Drum”.
Hi-hat
Depending on the drummer and the musical style, hi-hats can be so loud that some engineers don’t even bother miking them, but put a mic on them just so you have the option of using it if you need it. When miking the hi-hats, put the mic above the top cymbal, about 3″–4″ above, and about halfway between the center and the outer edge. If you get too close to the edge of the cymbals, you’ll end up with a cuppy sound that accents the opening and closing of the hats. If you put the mic too close to the bell, you end up with a pinging sound. If you mic hi-hats from the sides, you’ll get a rush of air every time the hi-hats close together. Experimentation with placement is critical, and each drummer’s hi-hats will sound different (brighter/darker) along with their technique, so try different placements and mics depending on how they play.
Some of my favorite hi-hat mics include the Shure SM81, AKG C 451 B, Neumann KM 184, and Audio-Technica AT4051.
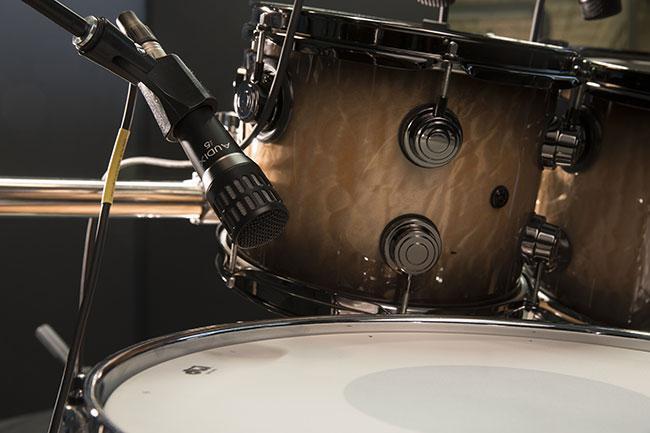
Toms
Shure 98AMP/C mics on toms
Like all drum miking, there are lots of options for microphone choice and placement for toms. If you’re in the studio, you can employ whatever mics (regardless of size) and all the hardware you need. For stage, and especially for video however, you might need microphones that are less visible. For mic placement when using mic stands, many of the same rules for snare miking apply. Put the mic near the outer rim of the tom head, pointing down. One big determining factor when it comes to tom mic placement is the presence of the cymbals, both physically and sonically. Some drummers position their cymbals so low over the toms that getting a microphone beneath them is very difficult. In that case, a low-profile clip-on dynamic mic such as the Sennheiser e604 may be just the ticket, or even the Granelli Audio Labs G5790, which is a classic 57 with a right-angle bend in the middle. One of the studio-standard mics for toms is the Sennheiser MD 421 II, which sounds amazing. When it comes to condensers on toms, the low-profile Audio-Technica Artist Elite AE3000 sounds really sweet. And if you’re doing a video shoot and need a mic that is nearly invisible to cameras, the Shure Beta 98AMP/C is tiny and affordable yet doesn’t compromise on sound at all — the 98AMP/Cs (seen above) are in constant use on the Performance Theatre stage at Sweetwater.
NOTE: Some engineers think that using hypercardioid mics on toms, due to their tighter polar pattern, is preferable for rejecting cymbals from the rear. But many hypercardioid or supercardioids have a high-frequency lobe (area where it picks up sound) directly behind the mic, and it’s frequently worse in the high-frequency range (5kHz and above). Using hypercardioids on toms may actually accent the cymbals that are directly behind the mic far more than a standard cardioid dynamic.
Overhead
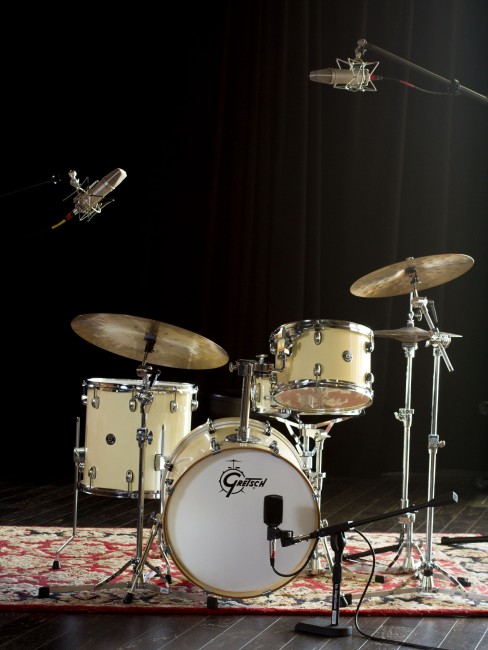
Neumann U87s set up using the Glyn Johns technique
There are lots of different approaches for overhead mics, ranging from Eddie Kramer’s 3-mic technique using Shure KSM44As (positioned left, center, right, in a triangle shape over the drums) to the Glyn Johns’ 3-mic technique (if you include the kick drum mic) with mics positioned equidistant from the snare at roughly 11 o’clock and 3 o’clock over the drums (drummer’s perspective). The most common overhead miking setup is probably two spaced cardioids above the drums over the left and right sides of the kit. I’ve tried using mic pairs in XY or even in M-S (mid-side) over the drums, but I generally go back to a spaced pair. To read more about stereo miking techniques, check out this article about methods you should try.
Personally, I’ve had the greatest success gathering an overhead perspective of the entire kit instead of just the cymbals. For recording I start dialing in my drum sound by listening to only the overhead mics and then fill in with the spot mics. I generally use more colored mics that are less bright than if I was just trying to pick up the cymbals. I’ve used Audio-Technica 4047/SVs for about a dozen years, but I’ve also had success with Telefunken C12s, the Neumann U 87 Ais, AKG C414 XLIIs, and DPA 4006-As through the years. And the Audio-Technica AT5045s are great sounding on drum overheads and a new favorite here at Sweetwater.
Room
Capturing the room, the space around the drums, is often critical to getting a good drum sound, because it can be the glue that holds all the disparate multi-miked tracks together. A pair of mics that is positioned 4 feet in front of the kit and about 2 feet above the floor can give a great overall sonic picture of the totality of the kit. A stereo ribbon mic such as the AEA R88 excels at this job. You can also position mics as far away from the drums as possible, given the size of the room you’re recording in. A pair of LDCs, spaced 90 degrees apart from the drum center, works well. Or if you’re in a smaller room, you can put dynamic mics in the corners, pointing away from the kit, or figure-8 mics in the corners with the drum kit sitting in the nulls (90 degrees off-axis) to create a bigger room sound.
For lots more pointers, check out these videos and other articles from Sweetwater about miking drums.
- Drum Miking Techniques for Live Sound
- How to Mic a Drum Kit
- How to Mic a Kick Drum
- How To Mic Drums for Recording, Part 1 — Two Microphones
- How To Mic Drums for Recording, Part 2 — Four Microphones
- How To Mic Drums for Recording, Part 3 — Multiple Microphones
- How to Create a “Mic Room” for Kick Drum Mics
- How to Multi-mic Your Snare Drum
- How to Get a Great Snare Drum Sound
- Pro Tips for Enhancing Your Drum Sound
- Best Drum Mic Kits
- Drum Mic Shootout with Mike Johnston
Author

Join Our Beyond the Beat Newsletter
All the latest drums news, interviews, lessons, reviews, deals and more, direct to your inbox!

